Has your once-reliable standing garment steamer started sputtering water or losing its steam power? A common culprit behind these frustrations is a cracked steamer hose. Instead of discarding your entire unit, learning how to replace the hose yourself can save you money and extend the life of your appliance. This guide will walk you through the process, empowering you to tackle this common repair with confidence and a few basic tools.
What Causes a Garment Steamer Hose to Crack?
Garment steamer hoses are subjected to a challenging environment of high temperatures, steam pressure, and frequent flexing. Over time, these conditions can lead to material degradation, resulting in cracks and leaks. Several factors contribute to this wear and tear:
- Material Fatigue and Age: Like any material, the plastics and rubbers used in steamer hoses can weaken and become brittle with age and repeated exposure to heat and steam.
- Thermal Expansion and Contraction: The constant heating and cooling cycles cause the hose material to expand and contract, which can create microscopic cracks that eventually grow larger.
- Mechanical Stress: Frequent bending, kinking, or pulling on the hose, especially near the connection points to the steamer base or nozzle, can stress the material and lead to premature cracking. The areas closest to the joints are particularly vulnerable due to concentrated flexing.
- Mineral Buildup: While not a direct cause of cracks, hard water deposits can build up inside the hose or fittings, potentially increasing internal pressure or exacerbating wear by creating rough surfaces.
Signs Your Steamer Hose Needs Replacing
Identifying a cracked steamer hose early can prevent further damage to your appliance and surrounding areas. Look out for these telltale signs:
- Visible Cracks: The most obvious sign is seeing actual fissures or splits on the exterior of the hose, particularly near the connection points.
- Water Leaks: Drops of water appearing on the floor or around the steamer base during or after use indicate a breach in the hose.
- Reduced Steam Output: If your steamer is producing less steam than usual, or the steam is inconsistent, it could be escaping through a crack in the hose before reaching the nozzle.
- Sputtering or Uneven Steam: Water might mix with the steam, leading to sputtering or an uneven steam flow, which can dampen and potentially stain your garments.
- Hissing Sounds: An unusual hissing noise emanating from the hose during operation suggests steam is escaping.
Essential Tools and Replacement Parts
Before you begin the replacement process, gather the necessary tools and the correct replacement hose. Having everything ready will make the repair smoother and quicker.
- New Replacement Hose: This is the most crucial part. Ensure it’s compatible with your specific steamer model or is a universal fit for standing garment steamers. Check the length and diameter specifications if possible. Many replacement hoses are made from durable PVC and heat-insulating nylon for longevity.
- Screwdriver Set: You may need Phillips or flathead screwdrivers to open panels or loosen clamps, depending on your steamer’s design.
- Pliers: Adjustable pliers or channel locks can be useful for gripping and unscrewing stubborn fittings. Wrap the jaws with cloth tape to prevent scratching metal surfaces.
- Clean Towels/Rags: For wiping up spills and protecting your work surface.
- Small Brush or Pipe Cleaner: Handy for cleaning out mineral deposits from fittings.
- Distilled White Vinegar or Descaling Solution: For cleaning mineral buildup.
- Safety Gloves: To protect your hands during the process.
Step-by-Step Guide: Replacing Your Steamer Hose
Replacing a cracked steamer hose is a straightforward DIY task that most people can accomplish with a little patience. Follow these steps carefully to ensure a safe and effective repair.
Safety First: Unplug and Cool Down
|
Our Picks for the Best Standing garment steamer in 2026
As an Amazon Associate I earn from qualifying purchases.
|
||
| Num | Product | Action |
|---|---|---|
| 1 | SALAV® Heavy Duty Smart Auto Shut-off Commercial Full-Size Garment Steamer, Beeping Alert when Water Runs out, Foot Pedal Control, XL 3L (101.5 oz) Tank, 1800 watts, 90+min of Continuous Steam, Navy |

|
| 2 | Jiffy Steamer J-2000 Jiffy Garment Steamer with Plastic Steam Head, 120 Volt, Beige |
|
| 3 | True & Tidy Heavy Duty Commercial Full Size Standing Garment Steamer for Clothes with Extra Large 3L (101 oz) Water Tank for 90+ mins of Steam Time, 1800 watts of Powerful Steam, 3 Settings, Gray |
|
| 4 | Upright Steamer for Clothes 1350W Turbo Boiler Standing Garment Steamer 1.6L Water Tank 1h Continuous Steam Flat&Hanging Ironing Double Retractable Rod 10 Modes 30s Fast Preheat for all Fabrics |
|
| 5 | SALAV GS18-DJ Standing Garment Steamer with Roll Wheels for Easy Movement, 1.8L Water Tank for 1 Hour Continuous Steaming, Adjustable Pole for Storage, Includes Descaler Packet, 1500 watts |
|
| 6 | SALAV Heavy Duty Commercial Full-Size Garment Steamer with Foot Pedals and Extra Large 3L (101.5 oz) Water Tank, 1800 watts, 90+min of Continuous Steam (White) |
|
| 7 | SALAV GS18 Full-Size Clothes Steamer - 1500W Power, 1.8L Water Tank, 60-Min Garment Steam, Iron Clothing, Adjustable Pole & Wheels for Easy Storage, Professional Standing Steamer for Clothes, White |
|
| 8 | Pure Enrichment PureSteam XL Standing Fabric Steamer - Professional Wrinkle Remover Heats in 45 Seconds; 1/2-Gallon Tank for 1 Hour of Steaming; Easy-Roll Wheels, Garment Hanger, & Fabric Brush |
|
| 9 | SALAV Heavy Duty Commercial Full-Size Garment Steamer with Foot Pedals and Extra Large 3L (101.5 oz) Water Tank, 1800 watts of Poweful Steam (Navy) |
|
| 10 | Garment Steamer for Clothes Standing, 1500W Efficient Clothes Steamer Standing with Wheels, Professional 58OZ Water Tank for Continuous Steaming, Fast Heating Wrinkle Remover |
|
Before touching any part of your steamer, immediately unplug it from the electrical outlet. This is paramount to prevent electric shock. Allow the steamer to cool down completely, ideally overnight, to ensure no residual heat or steam pressure remains.
Drain the Water Tank
Empty any remaining water from the steamer’s reservoir. This prevents spills during disassembly and ensures you’re working with a dry appliance. Some models may have a drain plug, while others require you to simply remove the water tank.
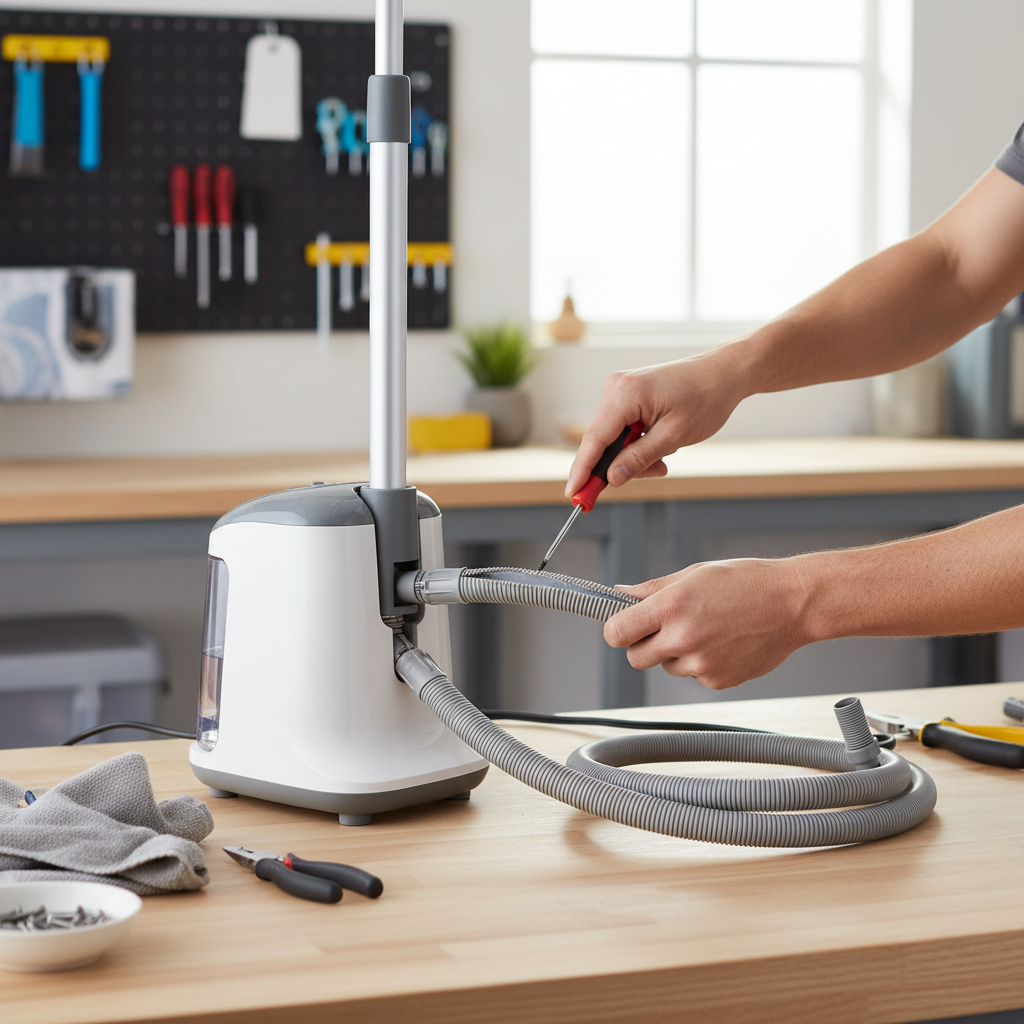
Disconnect the Old Hose from the Steamer Base
Locate where the hose connects to the main steamer unit. This connection can vary by model:
- Screw-on Collar: Many steamers have a threaded collar that secures the hose. Turn it counter-clockwise to loosen and remove the hose. You may need pliers, but be gentle.
- Internal Connection: Some models require opening a rear or bottom panel of the steamer to access an internal fitting. Use a screwdriver to remove any screws, carefully detach the panel, and then unclip or unscrew the hose connection.
Detach the Hose from the Steamer Nozzle/Handle
Next, disconnect the other end of the hose from the steamer nozzle or handle assembly. This connection is often a simple twist-and-pull mechanism, but some might involve a small clasp or screw that needs to be disengaged. If there’s a clothes hanger pole, you might need to remove it first.
Clean Connection Points
Once the old hose is completely removed, inspect the connection points on both the steamer base and the nozzle. You might find white, chalk-like residue or mineral buildup. Use a small brush or pipe cleaner to dislodge any debris. For stubborn mineral deposits, soak the fittings in a vinegar solution overnight, then scrub with a toothbrush dipped in a baking soda paste. Rinse thoroughly and allow to dry completely before reinstallation.
Install the New Hose
Carefully attach the new replacement hose. Start by connecting it to the steamer nozzle/handle, ensuring a secure fit. Then, connect the other end to the steamer base.
- Alignment: Ensure the hose is aligned correctly and not twisted or kinked during installation, as kinks can restrict steam flow and lead to future damage.
- Secure Fittings: Tighten any screw-on collars or re-secure internal clips firmly but without overtightening. If you opened a panel on the steamer base, carefully replace it and secure all screws.
Test Your Steamer
Fill the water tank with distilled water and plug the steamer back into the outlet. Turn it on and allow it to heat up. Carefully observe for any leaks around the new connections and check for consistent steam output from the nozzle. If everything looks good, your steamer is ready for use!
Maintaining Your Garment Steamer Hose for Longevity
Proper care can significantly extend the life of your steamer hose and prevent premature cracking.
- Avoid Kinking and Bending: Store your steamer in a way that avoids sharp bends or kinks in the hose. Allowing the hose to hang naturally or coiling it loosely is ideal.
- Use Distilled Water: Hard water is a major contributor to mineral buildup, which can obstruct steam flow and potentially cause internal pressure issues. Using distilled water minimizes these deposits.
- Regular Descaling: Even with distilled water, some mineral residue can accumulate. Periodically descale your steamer according to the manufacturer’s instructions, often involving a vinegar-water solution.
- Gentle Handling: Always handle the hose and connections gently. Avoid pulling on the hose to move the steamer or tugging forcefully on the nozzle.
- Empty Water Tank After Use: Draining the water tank after each use helps prevent stagnant water and mineral buildup within the system.
When to Consider Professional Repair or Replacement
While DIY hose replacement is often feasible, there are instances where professional assistance or a complete steamer replacement might be the better option.
- Complex Internal Damage: If disassembling the steamer reveals intricate internal damage beyond just the hose, or if electronic components are affected, professional repair is advisable.
- Electrical Issues: Any signs of electrical problems, such as sparking, strange odors, or failure to power on, should prompt immediate disconnection and professional assessment. DIY electrical repairs can be dangerous.
- Inability to Find Compatible Parts: If you cannot source a suitable replacement hose specific to your steamer model or a universal option, a professional might have access to specialized parts, or it may be time for a new appliance.
- Cost vs. New Unit: If the cost of a replacement hose and your time spent on repair approaches the price of a new, entry-level steamer, consider the long-term value of investing in a new unit.
- Warranty: If your steamer is still under warranty, attempting a DIY repair might void it. Check your manufacturer’s policy before proceeding.
“Many users underestimate the impact of regular maintenance on their steamer’s lifespan. Simple habits like using distilled water and proper storage can prevent common issues like hose cracks and keep your garments looking their best.” – [Admin], Lead Technician at reviewtym.com
Conclusion
Replacing a cracked standing garment steamer hose is a manageable DIY project that can restore your appliance to full functionality. By understanding the causes of hose damage, recognizing the warning signs, and following a few simple steps, you can save money and prolong the life of your steamer. Remember to always prioritize safety by unplugging the unit and allowing it to cool before beginning any repairs. With a new hose and proper maintenance, you’ll be enjoying wrinkle-free clothes again in no time.
What other steamer repairs have you successfully tackled yourself?
Câu Hỏi Thường Gặp
How often should a garment steamer hose be replaced?
The lifespan of a garment steamer hose varies greatly depending on usage frequency, water quality, and handling. With proper care and the use of distilled water, a hose can last for several years. However, if you notice any leaks, cracks, or a significant decrease in steam output, it’s time for a replacement, regardless of age.
Can I use any hose as a replacement for my garment steamer?
No, it’s crucial to use a hose specifically designed for garment steamers or a universal replacement hose that matches your steamer’s specifications, particularly in terms of diameter and connection type. Generic hoses may not withstand the high temperatures and pressure, leading to safety hazards or poor performance.
Is it safe to repair a leaking steamer hose with tape or glue?
Attempting to patch a cracked steamer hose with tape or glue is strongly discouraged. These temporary fixes are unlikely to withstand the high heat and steam pressure, making them ineffective and potentially dangerous. A proper replacement hose is the only safe and reliable solution for a cracked or leaking hose.
How do I prevent my new steamer hose from cracking?
To maximize the lifespan of your new steamer hose, consistently use distilled water, avoid kinking or sharply bending the hose during use and storage, and perform regular descaling of your steamer. Gentle handling and proper storage will significantly reduce mechanical stress on the hose material.
Where can I buy a replacement steamer hose?
Replacement steamer hoses can typically be purchased directly from the steamer manufacturer, through appliance parts retailers, or from online marketplaces. Look for hoses specifically labeled for garment steamers and ensure compatibility with your model if possible, or opt for a well-reviewed universal replacement.