There’s nothing quite as frustrating as reaching for your garment steamer, ready to smooth out wrinkles, only to find it sputters or refuses to produce steam. A clogged nozzle is a common culprit, turning a quick de-wrinkling task into a standstill. But don’t worry, most clogged steamer nozzles can be fixed quickly and effectively with a few simple steps and common household items. This guide will walk you through the immediate fixes, a comprehensive descaling process, and essential prevention tips to keep your steamer running smoothly.
What Causes a Steamer Nozzle to Clog?
The primary reason for a clogged steamer nozzle is the accumulation of mineral deposits, often referred to as limescale, from using tap water. Tap water contains various minerals like calcium and magnesium. When this water is heated repeatedly in your steamer, these minerals can precipitate out and build up on the heating element, in the internal pipes, and especially in the small openings of the nozzle. Over time, these deposits restrict steam flow, leading to weak steam, spitting water, or a complete blockage. Less commonly, lint or debris from clothes can also find its way into the nozzle, causing an obstruction.
Immediate Quick Fixes for a Clogged Steamer Nozzle
When you need a fast solution, these methods target the nozzle directly to clear blockages. Always ensure your steamer is unplugged and completely cool before attempting any cleaning.
Physical Cleaning of the Nozzle
|
Our Picks for the Best Standing garment steamer in 2026
As an Amazon Associate I earn from qualifying purchases.
|
||
| Num | Product | Action |
|---|---|---|
| 1 | SALAV GS18-DJ Standing Garment Steamer with Roll Wheels for Easy Movement, 1.8L Water Tank for 1 Hour Continuous Steaming, Adjustable Pole for Storage, Includes Descaler Packet, 1500 watts |

|
| 2 | Upright Steamer for Clothes 1350W Turbo Boiler Standing Garment Steamer 1.6L Water Tank 1h Continuous Steam Flat&Hanging Ironing Double Retractable Rod 10 Modes 30s Fast Preheat for all Fabrics |
|
| 3 | SALAV Heavy Duty Commercial Full-Size Garment Steamer with Foot Pedals and Extra Large 3L (101.5 oz) Water Tank, 1800 watts of Poweful Steam (Navy) |
|
| 4 | Garment Steamer for Clothes Standing, 1500W Efficient Clothes Steamer Standing with Wheels, Professional 58OZ Water Tank for Continuous Steaming, Fast Heating Wrinkle Remover |
|
| 5 | SALAV Heavy Duty Commercial Full-Size Garment Steamer with Foot Pedals and Extra Large 3L (101.5 oz) Water Tank, 1800 watts, 90+min of Continuous Steam (White) |
|
| 6 | SALAV GS18 Full-Size Clothes Steamer - 1500W Power, 1.8L Water Tank, 60-Min Garment Steam, Iron Clothing, Adjustable Pole & Wheels for Easy Storage, Professional Standing Steamer for Clothes, White |
|
| 7 | Pure Enrichment PureSteam XL Standing Fabric Steamer - Professional Wrinkle Remover Heats in 45 Seconds; 1/2-Gallon Tank for 1 Hour of Steaming; Easy-Roll Wheels, Garment Hanger, & Fabric Brush |
|
| 8 | SALAV® Heavy Duty Smart Auto Shut-off Commercial Full-Size Garment Steamer, Beeping Alert when Water Runs out, Foot Pedal Control, XL 3L (101.5 oz) Tank, 1800 watts, 90+min of Continuous Steam, Navy |
|
| 9 | True & Tidy Heavy Duty Commercial Full Size Standing Garment Steamer for Clothes with Extra Large 3L (101 oz) Water Tank for 90+ mins of Steam Time, 1800 watts of Powerful Steam, 3 Settings, Gray |
|
| 10 | Jiffy Steamer J-2000 Jiffy Garment Steamer with Plastic Steam Head, 120 Volt, Beige |
|
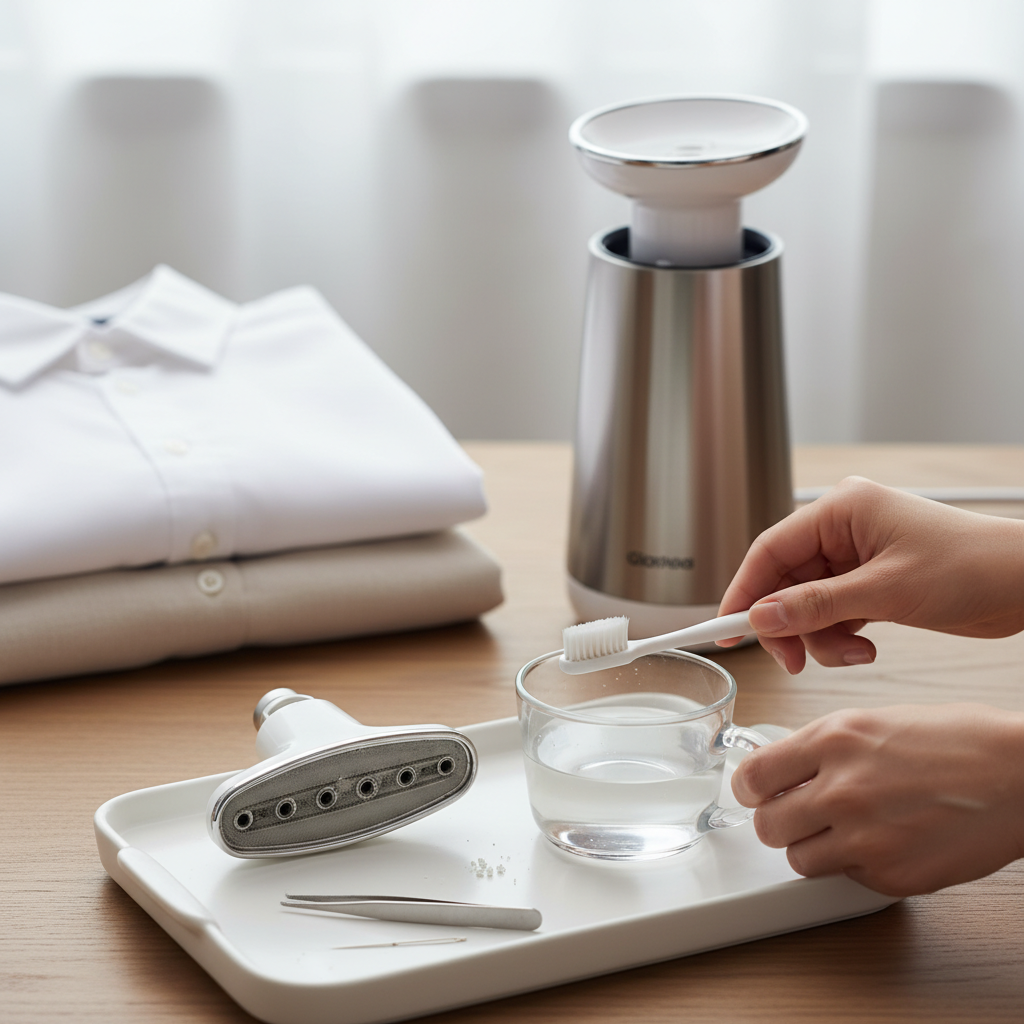
For visible blockages or minor clogs, a simple physical cleaning can often do the trick.
- Unplug and Cool: First and foremost, disconnect your steamer from the power outlet and allow it to cool down completely. Safety is paramount when dealing with electrical appliances and hot components.
- Inspect the Nozzle: Carefully examine the steam output holes on the nozzle head. Look for any white, powdery residue (limescale), lint, or other debris.
- Clear Obstructions: Use a small, non-abrasive tool like a toothpick, a straightened paperclip, a sewing needle, or a soft-bristled brush (like an old toothbrush) to gently poke and dislodge any visible buildup from each steam hole. Be careful not to scratch the nozzle surface or push debris further inside.
- Wipe Clean: After dislodging, wipe the nozzle surface clean with a damp cloth to remove any loose particles.
Vinegar Soak for Detachable Nozzles
If your steamer has a detachable nozzle, soaking it in vinegar is a highly effective way to dissolve mineral buildup.
- Detach the Nozzle: Follow your steamer’s instruction manual to safely remove the nozzle head.
- Prepare Vinegar Solution: Pour warm (not hot) white distilled vinegar into a small bowl. You can heat the vinegar slightly in a microwave to enhance its cleaning power, but ensure it’s not boiling. For particularly stubborn clogs, some experts suggest using undiluted vinegar. For regular maintenance, a 1:1 mixture of white vinegar and distilled water is often sufficient.
- Soak the Nozzle: Submerge the detachable nozzle in the vinegar solution. Ensure all the clogged areas are covered.
- Soak Time: Allow the nozzle to soak for at least 30 minutes, or for severe clogs, several hours or even overnight. The acetic acid in the vinegar will work to break down the mineral deposits.
- Rinse and Scrub: After soaking, remove the nozzle and rinse it thoroughly under running water. Use a small brush or toothpick to dislodge any remaining softened residue. Repeat the soak and rinse if necessary until all holes are clear.
- Reassemble: Once clean and dry, reattach the nozzle to your steamer.
Flushing with Vinegar Solution (for internal clogs)
If the entire steamer seems affected, or if the nozzle is not detachable, you can flush the system with a vinegar solution.
- Prepare Steamer: Ensure the steamer is unplugged and cool. Empty any remaining water from the tank.
- Fill with Solution: Mix equal parts white distilled vinegar and distilled water. Fill the water tank with this solution, but do not overfill.
- Heat and Steam: Plug in the steamer and turn it on. Once heated, direct the steamer head into a sink or a large bucket.
- Run the Steamer: Press the steam trigger and allow the vinegar solution to steam out until half or all of the solution has been used. You may notice white or brownish mineral flakes coming out with the steam—this is the descaling process at work.
- Soak (Optional): If the clog is severe, you can turn off the steamer when the tank is half empty, unplug it, and let the remaining solution sit in the boiler for 30 minutes to an hour to further dissolve deposits before completing the steaming process.
- Rinse Thoroughly: After running the vinegar solution, empty any remaining solution. Refill the tank with clean distilled water. Run the steamer again, directing the steam into the sink, until the entire tank of clean water has been used. This ensures all vinegar residue is flushed out, preventing any lingering vinegar smell or damage to your clothes. Repeat with clean water if necessary.
Step-by-Step Guide to Descaling Your Steamer (for comprehensive cleaning)
Regular descaling is key to long-term steamer health. This process is similar to flushing but with a stronger emphasis on letting the descaling agent work.
- Safety First: Always unplug your steamer and allow it to cool completely before starting. This is crucial for preventing burns and electrical hazards.
- Empty the Water Tank: Remove the water tank and empty any residual water.
- Prepare the Descaling Solution: For a thorough descaling, a 1:1 ratio of white distilled vinegar to distilled water is highly effective. Fill the water tank with this mixture, ensuring it does not exceed the maximum fill line.
- Initiate Descaling:
- For Soaking: If your steamer allows, pour the solution directly into the boiler (if accessible) or let the solution sit in the tank, allowing it to penetrate internal components. Some manufacturers recommend letting the solution sit overnight for stubborn buildup.
- For Steaming: Plug in your steamer and turn it on. Once it heats up, direct the steam head into a sink or bucket.
- Run the Cycle: Activate the steam function. Allow about half of the vinegar solution to steam out. This helps break down deposits throughout the system.
- Pause and Soak: Turn off and unplug the steamer. Let the remaining solution sit in the unit for approximately 30-60 minutes. This soaking period is critical for dissolving stubborn mineral buildup.
- Complete the Cycle: Plug the steamer back in, turn it on, and continue steaming the rest of the vinegar solution into the sink. Observe if any more mineral flakes are expelled.
- Rinse, Rinse, Rinse: This step is vital to remove all traces of vinegar. Empty any remaining solution. Fill the water tank with clean distilled water. Run the steamer until the tank is empty. Repeat this rinsing cycle at least two to three times, or until no vinegar smell is detectable and the water coming out is clear. This prevents vinegar from transferring to your clothes during future steaming sessions.
- Wipe Down: Use a soft, damp cloth to wipe the exterior of the steamer and the nozzle head, removing any lingering residue.
“Many common steamer issues, including clogged nozzles, stem from hard water. Regular descaling with a white vinegar solution isn’t just a fix, it’s preventative medicine for your appliance.” – Admin, ReviewTym.com, Steaming Appliance Specialist
Preventing Future Clogs
Prevention is always better than cure. By incorporating these habits, you can significantly prolong the life of your steamer and avoid frustrating clogs.
- Use Distilled Water: This is the single most effective way to prevent mineral buildup. Distilled water is free of minerals and will not leave behind deposits that can clog your steamer. While initially a small extra cost, it saves on maintenance and potential replacement.
- Empty the Water Tank After Each Use: Never leave water sitting in the tank or boiler when the steamer is not in use. This prevents stagnation and mineral accumulation.
- Regular Descaling: Even with distilled water, some minimal buildup can occur over time, or if you occasionally use tap water. Descale your steamer every 20-30 uses or at least once a month, depending on usage frequency and water hardness in your area.
- Proper Storage: Store your steamer in a dry, cool place. Ensure the hose and nozzle are not kinked, which could cause internal damage.
- Inspect Regularly: Take a moment to visually inspect the nozzle head and other accessible parts for any signs of buildup before each use. Catching issues early can prevent major clogs.
Conclusion
A clogged steamer nozzle can be a minor inconvenience, but with the right approach, it’s a problem that can be quickly resolved. Whether it’s a simple physical cleaning, a vinegar soak for the nozzle, or a comprehensive descaling of the entire unit, these methods will help restore your steamer’s full functionality. By understanding the root causes, primarily mineral buildup from tap water, and adopting preventative measures like using distilled water and regular maintenance, you can ensure your garment steamer remains a reliable tool for keeping your clothes perfectly smooth.
What’s your go-to trick for keeping your steamer clog-free?
Frequently Asked Questions
Why does my steamer spit water instead of producing steady steam?
Water spitting is often a clear sign of a partial clog, usually due to mineral buildup. The obstruction prevents a smooth flow of steam, causing water droplets to be forced out along with the steam. Descaling your steamer with a vinegar solution is typically the best remedy.
Can I use other descaling agents instead of vinegar?
While white distilled vinegar is the most common and safest household solution, some manufacturers offer proprietary descaling solutions specifically designed for their steamers. Always refer to your steamer’s manual before using any commercial descaling product, as some chemicals might not be compatible with your appliance’s internal components. Avoid harsh chemical cleaners or abrasive agents.
How often should I descale my garment steamer?
The frequency depends on how often you use your steamer and the hardness of your water. If you use tap water frequently, descaling monthly or even bi-weekly is recommended. If you consistently use distilled water, descaling every 2-3 months or after 20-30 uses should suffice to maintain optimal performance and prevent clogs.